Thank you

thankyou-web

Babywearing International of Tucson is so very grateful to all the volunteers, community partners, sponsors, and (of course) babywearing families that participated in our annual International Babywearing celebrations. Much love!!! We look forward to celebrating again in the future!

As always, we’ll continue to provide education and support around babywearing in the Tucson community.

Please follow us on Facebook to keep informed about our upcoming events! https://www.facebook.com/BWITucson/

You Won’t Want to Miss it!

main-event16
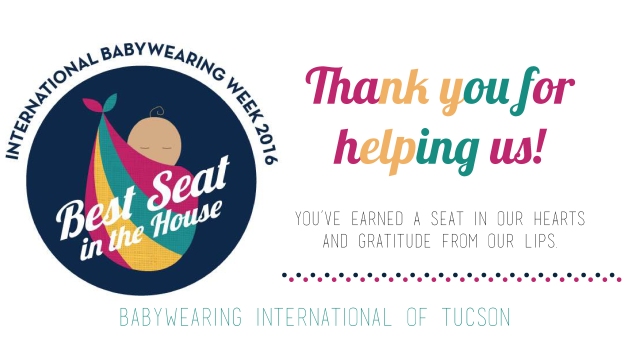
Tucson’s celebration of International Babywearing Week is quickly approaching! Don’t miss out on this opportunity to join Babywearing International of Tucson / Tucson Babywearers as we come together to celebrate and advocate for the practice of babywearing.

The heart of International Babywearing Week is celebration. The official celebration is the first week of October but our all-volunteer team has so much fun planned that we are starting our celebration a week early for two full weeks of fun (September 25-October 8)! We hope that you plan to join us for any or all of our 4th annual celebratory events. Subscribe to our Facebook events page to ensure that you stay tuned for all of the event details!

We’re planning in-person and online events throughout the two weeks, and many of the events are free or low-cost! Events include Babywearing Yoga; Babywearing Hiking; a Caregiver’s Night Out; Babywearing Zumba; a road trip to Apple Annie’s Orchard; professional Babywearing photo shoots; fun socials at splash pads, a local brewery, and other local attractions!

We are also planning for our Main Celebration and Fundraiser on October 8th at the downtown Tucson ASU School of Social Work Courtyard, where amazing prizes will be available to win (it’s a win-win – you support our non-profit chapter by purchasing raffle tickets and you increase your odds of winning an awesome prize donated to our chapter by generous community and national sponsors!). In addition to prizes, we’ll have food, entertainment, and a community showcase. Read more here. The address for the event is 340 N Commerce Park Loop (85745). There will be free parking available in the adjacent parking lot to the courtyard. There are several nearby Sun Tran bus stops.

Our celebration of International Babywearing Week would not be possible without the support of our generous community partners and sponsors. See the full list of community partners and sponsors here. Please take a moment to visit our sponsors online and thank them for their support!

We are so excited to have Tucson Babywearers join us at the events. ALL are welcome to our events — if you are expecting your first, are a seasoned babywearer who has never met another babywearer in real life, or consider yourself lucky to be a second or third generation babywearer whose bestie is also into babywearing. Friends and family are more than welcome too!

International Babywearing Week is Right Around the Corner!

General-IBW-Logo-FCInternational Babywearing Week is fast approaching – the celebration is October 2nd-8th. We hope that you plan to join us for any or all of our 4th annual celebratory events. Join this event to ensure that you stay tuned for all of the event details! There will be family friendly fun, prizes, and so many memories to share!

We’re planning events for every day during the week, and the majority of the events are free to attend! We are also planning for our Main Celebration and Fundraiser on October 8th in the downtown Tucson area, where amazing prizes will be available to win (it’s a win-win – you support our non-profit chapter with your donation and you increase your odds of winning an awesome prize donated to our chapter by generous community and national sponsors!).

We are so excited to have Tucson Babywearers join us at the events. ALL are welcome to our events — if you are expecting your first, are a seasoned babywearer who has never met another babywearer in real life, or consider yourself lucky to be a second or third generation babywearer whose bestie is also into babywearing. Friends and family are more than welcome too!

By the way, if you are interested in being a sponsor, vendor, and/or donor for the week contact us at babywearingtucson@gmail.com. You can see previous sponsors here…

Carry of the Month – October 2015: Jordan Back Carry with variations

What:    Jordan Back Carry and its variations

When:   31 days of October

Where: Start at Tucson Babywearers and take it anywhere you like!

Why:      It’s not because you can do it with any size wrap.

It’s not because you can do so many pretty and useful finishes with it.

It’s not because it prevents both leaning back and seat popping.

It’s because JBC is a wonderfully supportive and relatively easy to learn back carry that uses three basic types of passes (rebozo pass, cross pass, and horizontal pass) that would help you move your babywearing skills to a new level!

Now the details. For a basic Jordan Back Carry you need a base-1 size wrap (4 for petite ladies, 5 for average sized, and 6 for plus sized). You can always use a longer wrap if you have one, you’ll just have longer tails hanging from the knot. The other way of thinking about it is that you need a wrap one size longer than what you use for a ruck tied in front.

The carry starts like a ruck. You put your baby on your back by an age appropriate method that you are comfortable with (santa toss for smaller children, superman toss or hip scoot for older children). Then make a good deep seat by pulling the fabric down taut over the baby’s butt and flipping it under the baby. Since the first pass is a rebozo pass, you would bring one of the tails under your arm. Conversely you can start with one tail over your shoulder and one under your arm, and make the seat then.

Now it’s your chance to perfect your shoulder flip skills. Hold the whole width of the wrap taut under your arm, flip it over your shoulder, grab the top rail of the wrap to hold tight and spread the width of the wrap over the baby’s back. Since the second pass is a cross pass, you bring the whole width of the wrap under the baby’s back. Now you have a short tail coming from under your arm and a longer one coming over the same arm.

For the horizontal pass you take the long tail and bring it across the baby’s back so that it comes under the other arm. To finish tie it off in front with a double knot.

Things to keep in mind:

  1. Try to make a good seat from the start. You’ll reinforce it by a cross pass and a horizontal pass later, but having a good seat from the beginning makes the rest of the wrapping easier. Practice making your seat first over a soft surface or/and with a spotter who doesn’t panic easily.
  2. If you feel like your arms are too short to do shoulder flip and subsequently spread the wrap, try to work wide. That is, hold the wrap with both hands, use your elbows. Once it’s high enough you can always tighten the wrap job to your desire.
  3. To make the carry symmetric (since the ways a rebozo pass and a cross pass turn out are slightly different, especially since you’ll be doing them on the opposite sides) make the last pass a reinforcing pass instead of a horizontal pass. To do that, bring the wrap across the baby’s back, but instead of going over the leg, go under the leg.
  4. Don’t forget about pretty and useful variations.
  5. Have fun with it! JBC is a great way to show off both sides of a wrap.

Most useful variations (according to me):

Tied Tibetan: if you feel like the ruck straps fall off, if you have to accommodate a growing pregnant belly, if your wrap is slightly longer and you want to use it up, or if you just got an unseemly stain on the front of your shirt, do the Tibetan finish!  To do it, instead of tying off in front bring the tails across your chest and put them through the ruck straps. Then you can tie them off in the middle or do a knotless finish.

JBC with a ring: if don’t like even the idea of ruck straps, like more weight to be on your sternum and not shoulders, and if you have a slightly longer wrap, do the ring variation. To do it, once you have the first rebozo pass put both tails of the wrap through a large ring (use only rings designated for babywearing) and proceed as with the basic carry. You can tie it off in front or do a knotless finish through the ring.

Half-JBC: if you only have a shorty, are on the move, don’t have time to deal with tails, etc., this is for you. All you do is stop after the first two passes and tie off the carry at the shoulder with a double knot, a slip knot or do a candy cane chest belt. Another good thing about the Half-JBC is that it can be done without the shoulder flip.

Now to the instructional videos:

Basic JBC:

https://www.youtube.com/watch?v=z_6cO_gQctY

JBC with a ring:

https://www.youtube.com/watch?v=Ai6I1o-sMWE

Half-JBC:

https://www.youtube.com/watch?v=OcshSFS7HhI

Half-JBC without a shoulder flip:

~ Valentina

Babywearing and Limitations

I first started babywearing within a week of my first child’s birth. We started with k’tan, grew into the ergo, and then fell down the rabbit hole of wrapping, rings slings, and Mei Tais (oh my!). Expecting our second, I grew excited about wrapping another baby. Fortunately, while pregnant I was able to keep wearing my toddler while I built up a newborn stash.

And then she engaged badly in my hip. Any turn of her skull sent me to the floor in agony and I was unable to straighten my right hip.

And then I gave birth – which was wonderful and challenging like nothing else – and the pain didn’t go away. It only got worse.

For the first few weeks post partum, I could barely walk without a severe limp and a lot of pain. Rolling over in bed was excruciating. My pelvic joint was severely out of alignment both in the front (at the pubis) and the back (the SI joint), not to mention some soft tissue damage. Boy, oh boy, will I have “if you know what I sacrificed for you…” material for her when she becomes a teenager.

Thanks to several weeks of physical therapy I’m now mainly pain-free, though I’m limited in what and who I can wear. No soft structured carriers- redistributing the weight to my pelvis is a bad idea. Mei tais are also uncomfortable. Wrapping is fine, but only symmetrical carries, no hip carries. No wearing my crazy, adorable toddler, small infants only.

On the one hand, I still get to wrap my new baby and we are both healthy and comfortable. On the other hand, it’s been very hard adjusting to not being able to use my favorite SSC, not being able to wear my older kiddo, and having to embrace (gasp) the stroller. Heck, having to buy a double stroller in the first place – wearing newbie in the SSC and pushing Kaibeast in the stroller was my post-partum work out plan… not so much anymore. My tandem dreams? Done.

First world problems? Absolutely. First world, niche parenting method, babywearing problems? Check, and check.

However, this has also been a big wake-up call for me about respecting limits and limitations in babywearing in particular, and life in general. For me, my primary limitations are related to my physical ability to wear my children but the idea of limits and limitations encompass so much more. Maybe your limitation is that you work hours that don’t coordinate with your children’s schedule and don’t get as much time to babywear. Maybe it’s that your toddler, infant, newborn is on a wearing strike. Maybe they hate being worn or are still adjusting to being worn. Maybe you are struggling with t-rex arms and feel like you’re never going to manage to wrangle a baby and meters of fabric/all the buckles/those stupid rings that keep ending up in the middle of your chest. Maybe your wearing is limited by your, or your child’s, body. Maybe it’s limited by your budget. Maybe you always wanted to wrap, and you have a gorgeous stash of wraps, but really, if you’re honest, it’s the $30  mei tai that really gets the love while your wovens sit, artfully folded, in a box. Maybe babywearing is something you always wanted to do but just isn’t the right fit for your family. Maybe your whole family actually prefers the stroller – and that’s totally fine!

I just want to say that we all face limits in babywearing. Some are physical, some are psychological, some are our own, and some are our children’s – and it’s ok. Babywearing is a tool. If the tool fits the situation – great. But if it doesn’t, that’s ok too. It’s also a process that changes as we go along. What works today might not work tomorrow because we are human and our conditions change. Limits can be frustrating, but they can also open new and unexpected doors. I can’t wear my SSC, which means I’m become a wrap  and ring sling ninja. I can’t wear my toddler, so my partner gets more toddler-wearing action, and wraps make damn good toddler tents.

PS A final word to the post-partum mamas – be kind to your body, it’s been through a lot. You may not be ready to babywear right away. Don’t worry, you have many, many years of wearing to come. Don’t rush it, you only get to hold a newborn for so long. More importantly, listen to your body. If it starts objecting, tweaking, twinging, aching, or hurting, put the sling down. You’ll pick it up again soon, but let your body – your bones, muscles, ligaments, and brain – heal.

Using an infant insert in a soft structured carrier

The purpose of this post is to help achieve a proper fit in a soft structured carrier with a newborn, using an infant insert. DSC00678Soft structured carriers look deceptively easy to use, but can actually be quite challenging to fit comfortably. Even if you can get a larger child up with little fuss, try using one with a squirming newborn and the bulk of an infant insert, and it can be a recipe for frustration. Hopefully the pictures and video in this post will help.

First things first: Safety

You can find a detailed and beautifully illustrated resource on babywearing safety at Babywearing International.

Why do I need an infant insert with my soft structured carrier, why can’t I just use the rolled blanket hack?

Newborns are very small and in comparison to soft structured carriers. The big safety concern with newborns, and really all infants, is that they will slump in a baby sling, compromising the airway, and suffocate. Sad, horrible, but that’s at the base of the concern and why educators make the recommendations we do. While head control plays a large role in being able to keep an airway clear, the infant’s core strength plays an even bigger role. Core strength is something newborns simply do not have. Infant inserts, opposed to a rolled blanket, are designed to both boost the child in the carrier and provide essential side support to keep them from slumping over in the too-big body panel. Using a rolled blanket does not provide the necessary side support for a young infant. For this reason, manufacturers have amended their previous recommendations that infant inserts be used until 8 weeks, and now recommend using inserts until 4 months. (Exceptions to this are carriers purposefully designed to fit a newborn without an insert such as the Beco Gemini and Lilebaby, or designed to provide side support in conjunction with a carrier-specific insert, such as the Boba 4G).

Second: The SSC itself.

The SSC is made of a few different parts. The waist belt and webbing, the body panel, the shoulder straps and webbing, the chest clip, and the hood. All of the webbing is adjustable. I’d say about 95% of the people I help fit in SSCs have only ever bothered adjusting the waist. They either don’t realize that the shoulders and chest clips are adjustable or don’t know how to juggle adjusting with corralling their children. Without contest, not properly adjusting the straps for each user, each time the carrier is used, is the number 1 reason why SSCs are uncomfortable. Although important with a larger infant, this is even more important when dealing with an infant insert.

DSC00404

This is an example of a poorly adjusted SSC. The chest clip at the neck causes the shoulder straps to wing out to the sides and pulls on the wearer’s neck.

IMG_6230

Better clip positioning. In this picture, the model is wearing a 3 week old on the front, in an insert.

You can read more about how and why you should adjust the chest clip in this post: How I learned to stop worrying and love my soft structured carrier

Finally, putting it all together.

In the video below, I demonstrate how to wear and adjust an infant in an infant insert in an SSC. For this video, I am using the Ergo performance insert with a standard Tula. The directions are the same for any of the similarly designed inserts (pillow + back/side support).

Here are a few photos that will also help:

Positioning the newborn in the insert: The bottom should rest on the pillow part of the insert as if on a seat. The legs should fall naturally. DSC00680DSC00679 A note on fussiness and feet Most newborns get irritated (whimpering to screaming bloody murder) when their feet are messed with. DSC00683For this reason, many newborns will protest at being put frog-legged in an SSC from weeks 2ish-7ish (Our first child had no problems from week 4. Our second child was ok in an SSC at week 3, but then not again until week 6 ish). The design of the carrier against the wearer’s body may just be too uncomfortable for the child. As with many things – being cold at diaper changes, screaming when someone dares to put socks on the newborn, hating light/wind/noise/darkness/being hungry/being full/etc – this is a phase that many babies go through and grow out of. It may mean that you just have to wait a tad longer before heading out for a 6 mile hike with your newborn. That being said, there are a few things you can do to see if you can get the two of you more comfortable:

DSC00682DSC00684 Once you have everything and everyone sorted, reach in between you and the child to make sure that 1) the legs are generally parallel to the wearer’s body and not at an odd angle, and 2) pressure is off of the little feet. (Note the caption in the photo should also read “parallel” to the reader’s body. I blame sleep deprivation for the typo.)

IMG_6233

Face visible and kissable.

IMG_6232 Happy and safe babywearing!

Babywearing While Pregnant, the Second and Third Trimester

Babywearing in the second and third trimester feels a little bit like early tandem wearing. Bumps are getting bigger, babies are getting more active, and ligaments are stretching. We’re growing on the front and trying to find a place for the older child. In this phase, front wearing can still be a possibility – depending on the pregnant wearer’s comfort – but most carries are either done on the back or the hip.

Today’s post will follow up with the 3 moms we highlighted in Part 1 and see how things are going in the second and third trimester.

Kelly

The beginning of the second trimester required several changes to my babywearing. I could not carry comfortable on the front in either a wrap or a SSC and I found the SSC weight belt to be uncomfortable in back carries – but, I still needed a way to wrangle my toddler. So this Buckle-loving girl put away her Tula and dusted off her wraps. Being pregnant forced me to commit to wrapping nearly every day. In the process, my skills improved, I got much quicker at it, and I really learned to customize the wraps to fit my belly and my 2 year old. I’ve definitely gone from a Buckle-girl who wrapped on occasion, to a full-time wrapper.

For me, the key to getting a comfortable carry with my pregnant body and a toddler on my back is finding alternative finishes that can tie off over the bump. I’ve become a big fan of the Double Hammock and variations (tied at side, tied at side with a     candy cane chest belt, tied under bum, and the freshwater finish tied at side or under bum).

IMG_5676

Double Hammock tied at side with a chest belt.

DSC00133

Double Hammock Freshwater finish. At 7 months pregnant, I could do this in a 7.

IMG_5474

Double Robozo Shoulder to Shoulder in a 6.

IMG_5509

Double Hammock Freshwater finish tied under bum in a 5.

On the other hand, carries that have chest pass finishes with no horizontal pass (either a chest pass or a waist finish) – such as a Ruck Tied Tibetan or Shepherds – do not counter balance the weight well and become uncomfortable very quickly. As I’ve grown, so has my “base size”. Carries that I could do with a 5, now require a 7. In fact, I refer to 5s as my “shorties”.

The biggest change has been finding the ring sling love.

IMG_5852Until very recently, I’ve had a well-known reputation for being ring sling adverse – not for other people, but they never worked for me and my bowling ball of a child. Even at under 6 lbs, he felt heavy and diggy in a ring sling. However, about half way through the second trimester I had the opportunity to bundle him up in a quick ring sling hip carry. Because of the location of my bump, I had to wear him quite high on my torso and, all of a sudden, the ring sling love clicked. We use our ring sling at least once a day. It allows for some face-to-face toddler snuggles while also facilitating the quick ups and downs that 2-3 years olds are known for. Worn high on the torso, you can distribute the waist off of the pelvis and the abdomen, making for a comfortable hip carry. My toddler doesn’t fully understand what’s coming, but he can sense the changes in my body. These days, he frequently asks to be worn in the “mommy hug wrap”, for security and closeness.

Sabrina

11006058_10152747365003175_931944205_n

Sabrina also continued to wrap – and front carry! – throughout her pregnancy. Although not for long-term wearing, she reports that she can still do a front wrap cross carry over the bump with her 35# 2 year old. Like with Kelly and the ring sling, front carries have become a bonding point for her and her toddler.

She also back carries frequently, as the photos will attest. In the second and third trimesters, she prefers to do Rucks, Double Hammock Rebozos, and other Double Hammock variations. Speaking to the difference between wraps and wrappers, while Kelly more or less requires a multi-layered carry with a long wrap, Sabrina is still embracing the shorty-love.11006210_10152747365698175_234667161_n

Meg

For a variety of reasons, Meg’s babywearing, (well, external babywearing….) has tapered since entering the second trimester. She also finds that Rucks are a go-to for quick ups and downs and has been enjoying putting together a newborn stash.

Which brings us to…. preparing to wrap a new baby! All three of us currently have toddlers and are (were) expecting our second child. Although we all began babywearing at some point with our first children, neither of us have much (any?) experience wrapping a newborn. In the spirit of third trimester nesting, here are our (pre-baby) choices for our newborn stashes. We’ll follow up with each mom in the “Fourth Trimester” (post-birth) to see what we actually end up using.

Kelly

With my first child, we started with a Baby K’tan and the Ergo Performance with an infant insert. We used the K’tan for the first few weeks and then became deeply attached to the Ergo. This time around, we’ll still use the K’tan in the early days. Our Ergo has been replaced by a Tula, which fortunately works beautifully with the infant insert. My partner and I have enjoyed using both of these carriers with our big kid and we look forward to using them again.

In addition, I’ve accumulated a few additional carriers  that we’ll be trying with the newborn. When choosing carriers I looked for things that were flexible enough for an infant, but also supportive for a toddler. So far, they all work well for the 2 year old and I hope they’ll be good options for the n00bie. I’ve added a Natibaby Ring Sling, a size 5 Flamenco Hemp Indio, a size 6 Vaquero Cabana under the Sun, and a BBTai mei tai. I’m hoping to rock a lot of Front Wrap Cross Carries, Front Cross Carries, mei tai, and ring sling use. If all goes well, each of those should be good options for tandem wearing my toddler on my back in my beloved SSC.

Sabrina

Sabrina’s pre-baby newborn stash consisted of: Waka lacuna 4.2, clementine whisps of autumn 4m, ETLA AZ sunset twill 4.8m, uppy (gone) and dream weaver woven greater than 4.6m , nejesa RS cosmic ra.

11016546_10152767916183175_1660773798_n

Meg

11029997_10153130428191726_1445873926_o

“Here is my squish stash – Left stack:  Oscha Roses Juliet RS, Oscha Zen Roses RS, Didymos Lisca Pastell6.  Middle Stack:  Didymos Lisca Sunset 4, Didymos Lila Hemp Indio 6, Firespiral Moonlit Birch Trees 6.  Right Stack:  Bamboo Happy Wrap (Stretchy) and Mesh Ring Sling.

As far as my reasoning – Stretchy wrap will be awesome for a new baby (I loved mine with Blake).  they are soft, easy to wrap with, easy to wash and the bamboo makes it nice and thin for tucson heat.  The mesh ring sling will help me shower and swim with baby while chasing DS1. Hopefully…  The Liscas were both purchased (in base and Base – 2) because they are so soft and cuddly.  The LHI is one of the thinner hemp indios and will hopefully be good for Tucson.”

How I learned to stop worrying and love my soft structured carrier

As VBE and self-proclaimed buckle-loving babywearer, I find there are three main complaint’s wearers have with their soft structured carriers (SSC):

  1. The carrier pulls at the back of the neck.
  2. The webbing (bottom of the shoulder straps, where the buckles are), digs into my armpits
  3. My baby is fussy and it seems like their head is smooshed against my body

What would you say if I told you that in most cases there is a simple solution to all three problems? (and available today for 3 easy payments of $29.99…. ) It’s the chest clip. One of the most important adjustments to make is to find the proper positioning of the chest clip – which is actually on the wearer’s back in a front carry. Most people let this hang out around by their neck. DSC00395They either don’t know it can be lowered, or are afraid they won’t be able to reach it if it’s not at neck height. This results in digging/weighing heavily on the neck, the shoulder straps winging out to the sides of the wearers body rather than resting on their back, pulls the shoulder webbing buckles into the armpits, and pulls the top seam of the body panel tight against the baby’s neck without providing any tightening across the body of the SSC. DSC00404 DSC00396 Easy Fix: To find the proper placement for your body: with the carrier on, have a partner lower the chest clip until it rests somewhere between the wearer’s shoulder blades. You may have to play around with tightening, loosening, raising and lowering, but you’ll know once you get it in the right place. TADA

Properly placed chest clip

Properly placed chest clip

DSC00406

When the clip is worn high on the neck, it tightens the carrier primarily around the top seam of the body panel. In wrapping terms, this is similar to having too tight a top rail in a ring sling carry. (Safety note: The baby in the photos below is not a real child but a demo doll sitting on an infant insert pillow. An infant the size of this doll is much to small for this carrier. They would need to be in a full infant insert with the face visible at all times to be worn safely.) DSC00806 DSC00807 This both puts added pressure on the wearer’s neck and pulls the child’s head firmly into the wearer’s body. Baby is squished, wearer is uncomfortable, and no one is happy. More importantly, because the pressure is on the top seam of the body panel, it is unable to apply even pressure around the body of the carrier and will not provide back support to the child as when properly placed. When the clip is lowered, it distributes the tension around the middle of the body panel. DSC00809 f

This provides better support for the child’s spin and takes the pressure off both the child’s and wearer’s neck. Comparing the two photos, you can also see how lowering the chest clip pulls the shoulder strap webbing lower on the body and out from under the armpits. Problem: How the heck do I reach the darn thing to clip it? I’m not a yogini! Solution: Loosen your shoulder straps. You should be loosening and readjusting your shoulder straps each time you take the carrier on and off. By loosening them, you put slack into the straps allowing you to reach the clip easily. When properly positioned, the shoulder straps should be somewhat perpendicular (up and down, not at an angle) and rest on the wearer’s back. Readjusting the shoulder straps each time will ensure that you get a precise, and comfortable, fit. In addition to making babywearing more comfortable for the wearer, the chest clip is an important adjustment for the baby as well.

Carry of the Month for April: Double Rebozo Shoulder to Shoulder (DRS2S)

Double Rebozo Shoulder to Shoulder is a good beginner-intermediate back carry. It starts off center which makes it a little more challenging for some people. You can do this carry with a shorty wrap and have a knotless finish, or with a longer wrap and have a little more support in the carry overall.

One of the tips I have found to be important with this carry is to spread the fabric in the shoulder to shoulder part.  In a shorty version this will be the knotless finish, in the longer wrap version it will be the chestbelt.

This carry of the month is super simple in concept. There are not a lot of real variations, and since you’re trying this carry after having done front carries, hip carries, and some great back carries to begin learning with, you may find it super easy to do now that you have a good skill set for wrapping.  However, as with any carry with a woven wrap it can take a while to learn the skills involved.  Don’t be discouraged if you find you’re struggling with it, or it’s not comfortable for you, not every carry is going to work well for every person.

Safety: Please keep in mind that if this is your first time using a woven wrap or trying this carry, you should practice over a soft surface such as a bed or couch. If you are attempting this back carry or it’s variations for the first time, you should have a spotter and/or practice over a soft surface such as a bed or a couch, or even kneeling on a carpeted floor. You can also practice with a doll or stuffed animal first until you feel comfortable.  If this is your first time using a woven wrap please begin with a front carry such as FWCC or FWCC variations, which we have covered in a previous COTM: https://tucsonbabywearers.wordpress.com/2014/06/02/carry-of-the-month-for-june-fwcc-pwcc-fwcc-variations/

If you are a beginner with woven wraps, we recommend that your child be approximately 6 months old, with good neck control/head support, and able to sit before attempting ANY back carry.

Stretchy wraps (such as the Moby, Boba Wrap, DIY knit wraps, etc) are not designed for the carries described in this Carry of the Month and should NOT be used for back carries.
These video tutorials and more can also be found on our Pinterest: https://www.pinterest.com/BWITucson/cotm-8-drs2s/

I will always precede back carry COTMs with some videos and tips for getting baby on your back, off your back, and making a good seat.

Superman method

How to make a good deep seat + pre-seat with a superman toss

How to get baby off your back

Double Rebozo Shoulder to Shoulder (with shorty variations)

Carry of the Month for March: Rucksack and Ruck variations

COTM #7: Ruck, Reinforced Ruck, Ruck TUB, RRRR, Ruck TAS

We are returning to back carries this month with a bang! Ruck and it’s variations are popular carries for those newer to back carries, but they are also well loved among those with more experience.  All around, these are great back carries, and some come with a little extra support if it’s needed.

Rucksack carry and variations

The Rucksack carry is a great carry for those new to back carries with a woven because it is simple and fast (the more you do it, the faster you become). It starts with a ruck pass, which is over both legs of the child and over both shoulders of the wearer.  Bunched passes are then pulled back over one leg of the child and under the other with both passes ending in front to tie off.  The Rucksack carry is typically done with a base size wrap, or base -1.

The Ruck Tied Under Bum (or Ruck TUB) and the Ruck Tied at Shoulder (or Ruck TAS) are variations of the Rucksack carry that can be done with shorter wraps, typically sizes 2, 3, and 4 woven wraps work great for these. The Ruck TUB is essentially the Rucksack but instead of the bunched passes crossing over the child’s legs and then under to tie off in front, the bunched passes pass over the child’s legs and then tie off in a secure double knot under the child’s bum.

In Ruck TAS the carry starts somewhat off center and allows the wearer to work with only one side of the wrap instead of both.  After making the seat and tightening strand by strand, the longer tail is again bunched and then passed over both legs coming up to the front under the wearer’s arm and tying at the shoulder in a secure double knot, slip knot, or if there is enough length in the tails a few other tie off variations can be used.

As children get older and heavier reinforcing passes can add to the comfort of both child and wearer. The Reinforced Ruck may be the version for you if you feel extra support is needed, or if you just like extra support no matter what.  This version of the Rucksack does require the wearer’s base size wrap or longer.  For this carry, instead of bunched passes, we have spread passes which is where you will get the extra support.

Lastly the Reinforced Rear Rebozo Rucksack (RRRR) is another variation that can be done with a shorter wrap.  Depending on the wearer and the size of the child a size 2 woven wrap to a size 4 woven wrap can work wonderfully for this carry. Like Ruck TAS this carry starts off center and the wearer works primarily with one side of the woven wrap. RRRR (or the Pirate carry) uses a rebozo pass instead of a cross pass, the rebozo pass is spread over the beginning ruck pass and is brought under the opposite arm to tie at shoulder or in a chestbelt variation.

As with all wrap carries, importance is placed on creating a nice, deep seat for baby, with baby’s legs being in a good M position (knees above bum) and fabric supporting under the legs from knee to knee.

Younger babies should have fabric supporting them up to their necks, whereas older babies should be supported at least up to their armpits.

The hardest part about the Ruck carry and it’s variations is maintaining a good, deep seat for your child.  Sometimes the seat is popped due to over tightening the bottom rail, and other times t is popped by a quick, leg straightening child.  Either way you’ll want to make sure to keep that deep seat with knee to knee support as you finish the carry.

Some of the tie off variations you may see in the linked videos below are: Candy Cane Chest Belt (CCCB), Tibetan tie off, Knotless, and the slipknot.

Safety: Please keep in mind that if this is your first time using a woven wrap or trying this carry, you should practice over a soft surface such as a bed or couch. If you are attempting this back carry or it’s variations for the first time, you should have a spotter and/or practice over a soft surface such as a bed or a couch, or even kneeling on a carpeted floor. You can also practice with a doll or stuffed animal first until you feel comfortable.  If this is your first time using a woven wrap please begin with a front carry such as FWCC or FWCC variations, which we have covered in a previous COTM: https://tucsonbabywearers.wordpress.com/2014/06/02/carry-of-the-month-for-june-fwcc-pwcc-fwcc-variations/

If you are a beginner with woven wraps, we recommend that your child be approximately 6 months old, with good neck control/head support, and able to sit before attempting ANY back carry.

Stretchy wraps (such as the Moby, Boba Wrap, DIY knit wraps, etc) are not designed for the carries described in this Carry of the Month and should NOT be used for back carries.
These video tutorials and more can also be found on our Pinterest: https://www.pinterest.com/BWITucson/cotm-7-rucksack-carry-variations/

Getting your child on your back (practice this over a soft surface before trying a back carry if this is your first time trying a back carry):

Rucksack with hip scoot method:

Rucksack (with Reinforced Ruck variation):

Rucksack (with tips):

Ruck TUB (RUB):

Rucksack Tied At Shoulder (Ruck TAS):

Reinforced Rucksack:

Reinforced Rear Robozo Rucksack: 


RRRR with leg pass: 

Rucksack with different finishes: